Your first artwork in five minutes
One word, a font you choose, a colour, and an image file on your computer. This page walks the whole way from an empty artboard to a finished download.
1. Open a project
Go to the Editor from the Your tools row on the home page, or from the Go to editor button.
The Editor asks you to open a project or create one first. A project is the file that keeps your work in your account.
- Press Projects in the top bar if the list is not already open.
- Press New project and type a name for it.
- Press Create. An empty artboard opens.
2. Type your word
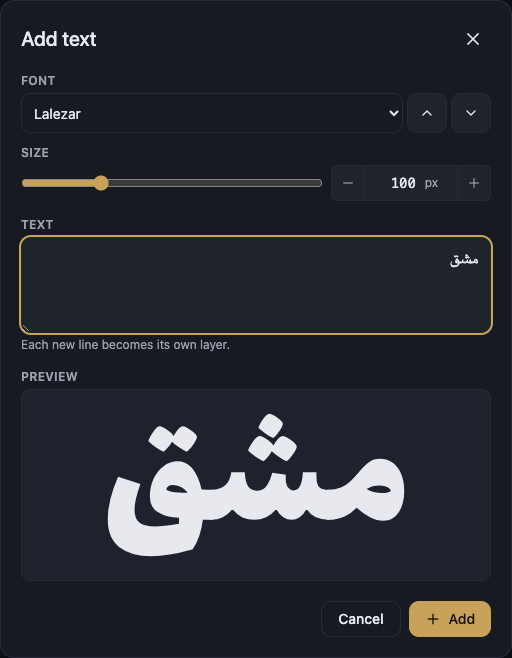
Double-click an empty part of the canvas, or press T. The Add text dialog opens.
Type your word in the field. The preview under it shows the word in the chosen font and size, and saving puts it on the canvas.
If you type more than one line, each new line becomes its own layer that you move and colour on its own.
3. Choose the font
Select the word with the Select tool, then open Font pack in the options bar.
Type in Search fonts to jump to a particular one, or use Previous font and Next font and the up and down arrow keys to flip through the library and watch your word change on the canvas as you go.
Some library fonts carry a Paid badge and need a subscription. Anything marked System is open to everyone.
4. Set the size and the place
Change Font size in the options bar, or drag the corner handles around the selection. Dragging a corner keeps the proportion, and holding Shift frees it if you want a deliberate stretch.
Drag the word itself to move it, and use the rotate handle to tilt it.
If you lose your view, open the Zoom menu in the status bar and pick Fit to screen to bring the artboard back to the middle.
5. Colour the word
Open Color in the options bar. There are three ways to paint: One colour, Solid colours and Gradient.
The quickest route is a Ready-made set, or one of the swatch palettes such as Ink, Gold leaf or Tile blue. From there you can fine-tune the shade on the colour wheel or by typing a hex colour.
To paint the whole page rather than the word, use Background in the top bar.
6. Export a PNG
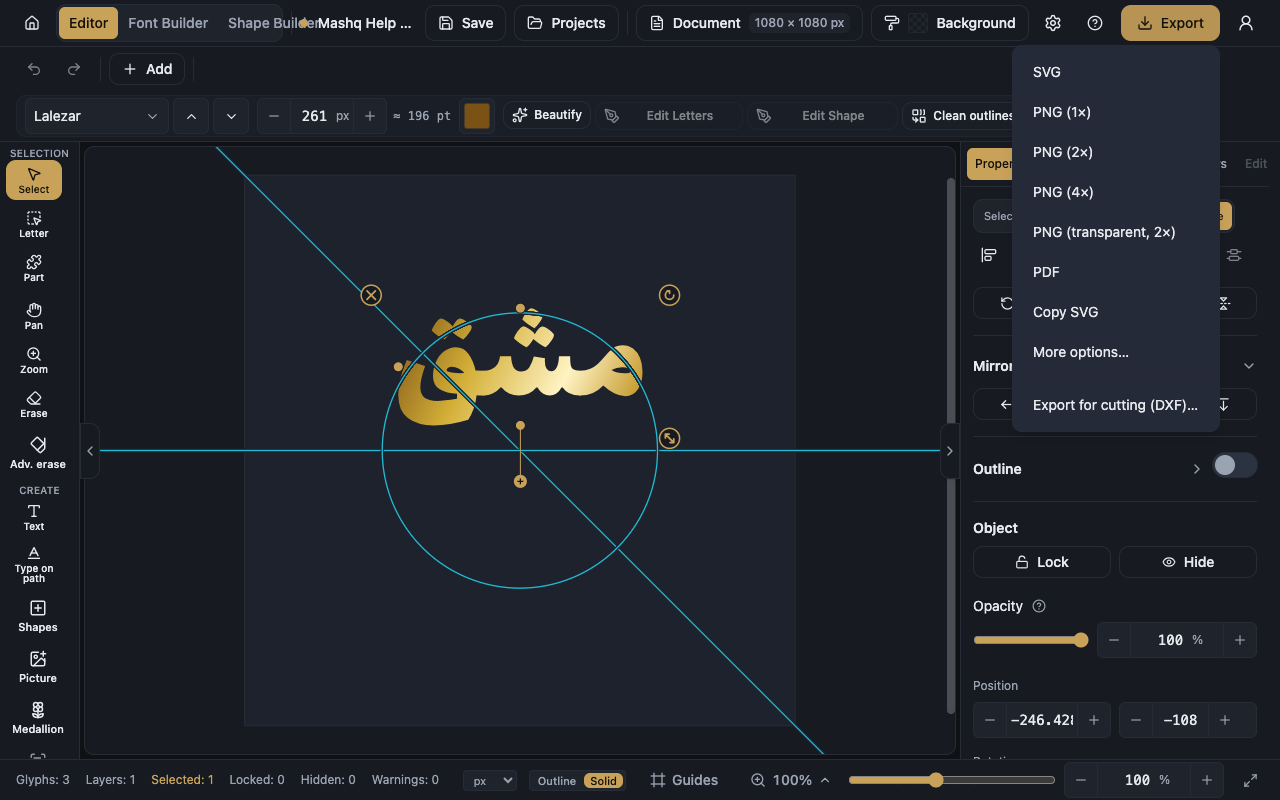
Open Export in the top bar and pick PNG (2×). The file downloads straight away.
For an image with no background behind the letters, pick PNG (transparent, 2×).
More options… opens the Export design dialog, with a live preview and the output size, where you set the frame, the resolution, the margin and the file name.
The high-resolution PNG (4×) and the SVG and PDF formats are on the Pro and Studio plans. See the Pricing section on the home page.
7. Check that it saved
Your work saves itself a moment after your last edit, and the top bar shows Unsaved changes and then Saved.
You can save whenever you like with the Save button or with ⌘/Ctrl+S. Where your work is saved has the details.