Choose a font
The font changes the look of your work more than anything else. This guide shows how to open the font list, how to try one font after another on the same text, and what the badges next to the names mean.
Change a layer's font
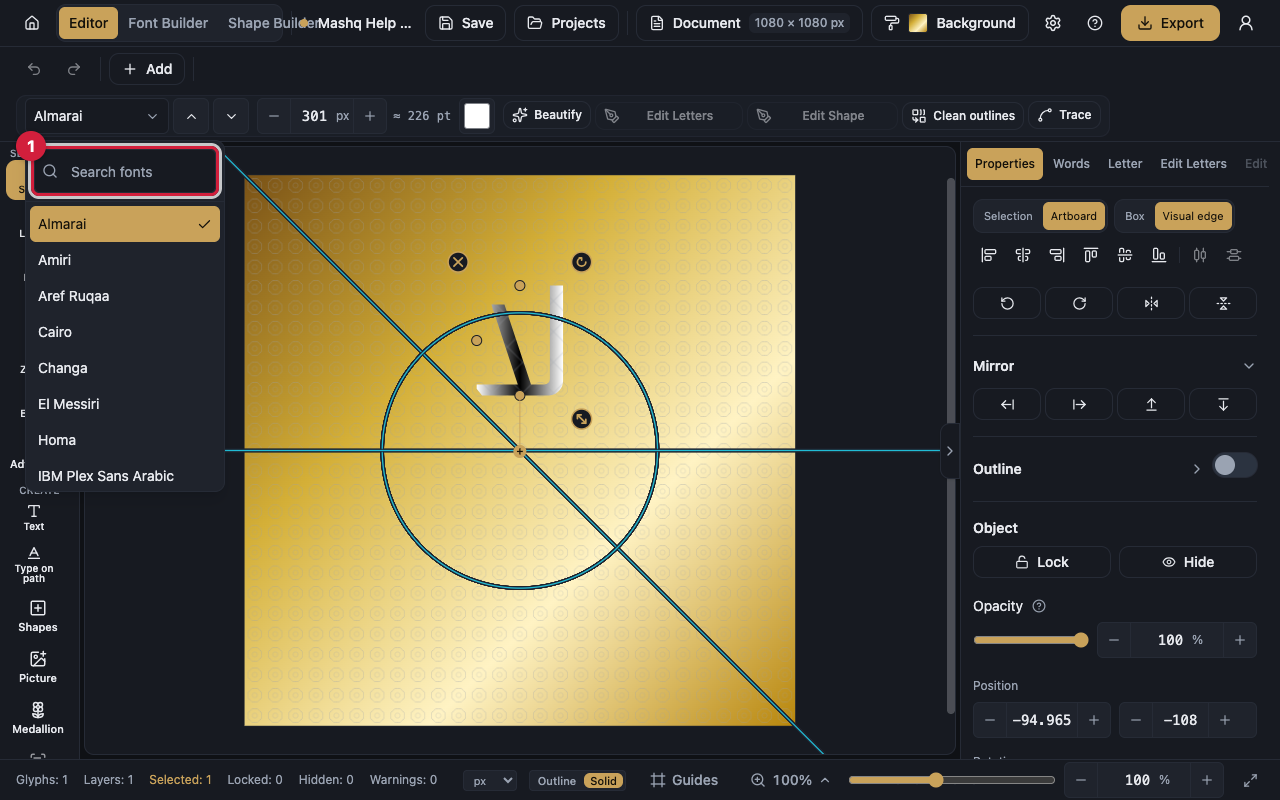
Font pack, in the options bar, is the font list. On a phone it sits in the Properties sheet at the bottom.
- Select the text layer.
- Open Font pack.
- Type part of a name into Search fonts if your list is long.
- Click the font name to apply it.
Flip through fonts on the canvas
The fastest way to compare is to keep your eye on the canvas and flip fonts with Previous font and Next font, or with the up and down arrow keys. The text redraws on every press, so you see the difference instead of imagining it.
The same arrows sit inside the Add text dialog, so you can settle the font while you are still typing.
What the badges mean
System marks a font from the platform's own library. You can use it in your designs but not edit it.
Paid marks a font that needs a paid plan. The pricing section on the home page lists what each plan includes.
Locked means the font is not available on your current plan, and touching it shows the upgrade notice.
Fonts you uploaded yourself appear in the same list, next to the library ones.
If you cannot find what you want
When the search returns nothing the list says No fonts found. Check the spelling of the name.
If you pick an uploaded font and see a note that it is still loading, wait a moment for the preview. If the editor says the font cannot be loaded, choose another one or upload it again.
You can add your own font to this list from the Font Builder. The guide Upload your own font walks through it.