Colours and gradients
One paint pop-up serves the whole editor: it colours the ink of your letters, a shape's fill and border, and the page background. This page covers the three ways to paint, how to tune a gradient, and where the ready-made colour sets live.
Opening the paint pop-up
The pop-up paints whatever is selected, so pick the layer you want to colour first.
A drawn shape has two separate paints, Fill and Border, and each one opens the same pop-up. The page itself is painted from Background in the app bar on a computer, and from the tool strip on a phone.
- Select the layer on the canvas.
- Open Color in the options bar.
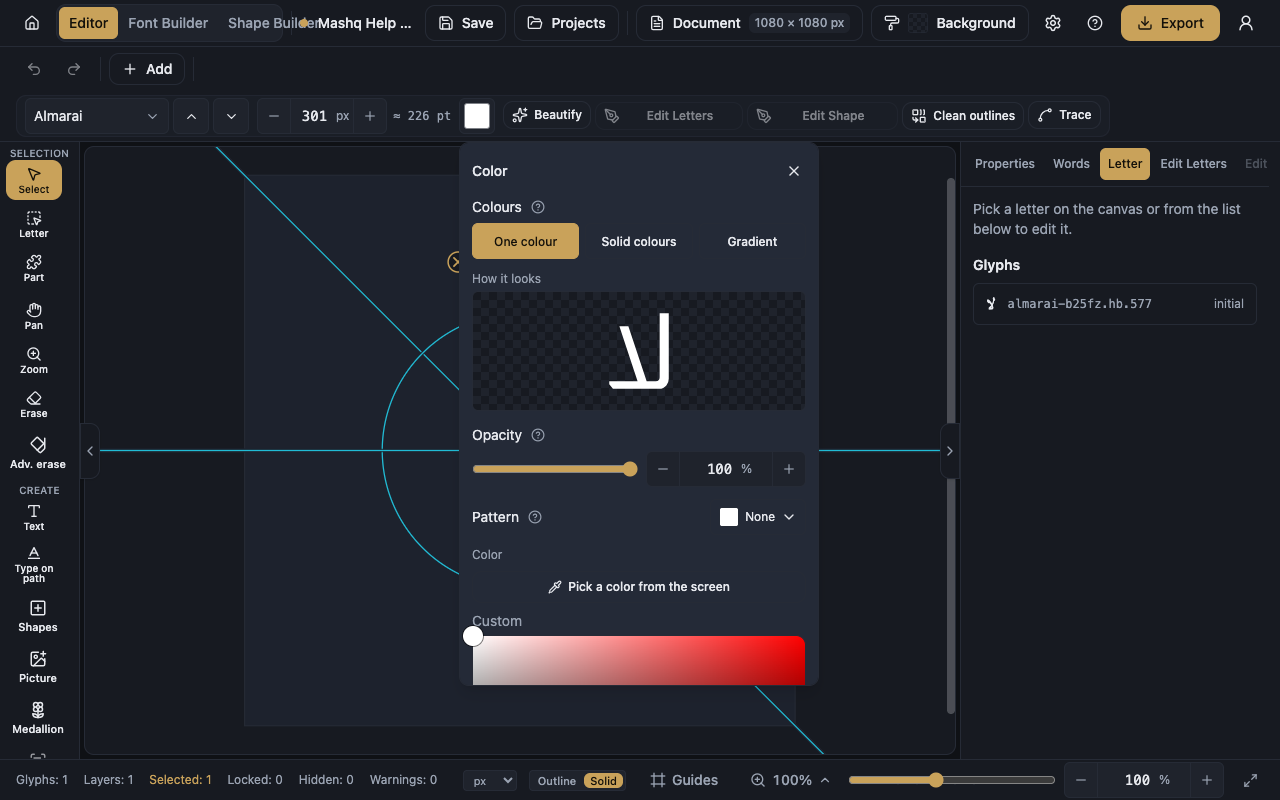
- Choose one of the three modes under Colours at the top of the pop-up.
The three ways to paint
One colour paints the whole thing in a single colour.
Solid colours lay two to four colours side by side. Each one meets the next at a hard line, and they never mix.
Gradient fades every colour into the one after it.
Working on the colour bar
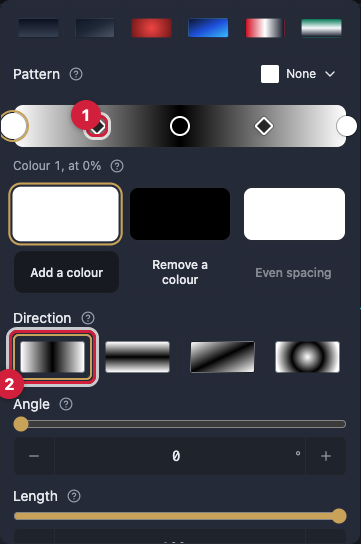
The bar shows the paint exactly as it will be drawn. Every dot on it is a colour, and where the dot sits is where the colour sits.
In a gradient a small diamond appears between two dots. Drag it to move where those two colours meet, so the blend leans towards one of them.
- Tap the bar where there is no dot to add a colour there.
- Tap a dot to open that colour for editing below.
- Drag a dot to move it, or set the number in Position of colour.
- Use Reverse the order to flip the colours, and Even spacing to put them back at equal distances.
Direction and angle
Direction decides which way the colours run: Horizontal, Vertical, Diagonal, or Radial out from the middle.
Angle gives you everything between those buttons, in degrees. Length is how much of the shape the gradient covers, so a shorter length leaves the first and last colour pure on either side of a narrower blend. Start position shifts where the run begins.
On a radial paint, Bright spot across and Bright spot down move the centre of the light away from the middle.
The colour wheel and the eyedropper
The bottom of the pop-up holds the full wheel: Saturation and brightness, Hue, Opacity, and Hex colour when you already know the code you want.
Pick a color from the screen lifts any colour you can see and drops it into the paint.
Ready-made sets and the palettes
Ready-made holds finished colour sets that apply in one tap, and it is the quickest route to a balanced gradient.
Next to them sit nine swatch palettes: Basic, Flags, Ink, Grayscale, Tile blue, Gold leaf, Desert sand, Oasis green and Pomegranate.
Worth knowing
Opacity inside the paint pop-up belongs to the one colour you are editing. Opacity in the Properties panel is different: it fades the whole layer together, the colour, the border, the glow and any look you added.
A shape needs at least one of Fill or Border, so you cannot switch both off.
Pattern lays a repeating motif over any of the three modes. It has its own page, Patterns and the page background.